


The Design Lab
Hello welcome to another tutorial by hv-designs. In this tutorial il be showing you how to make a simplistic colourful web design layout from scratch using photoshop.
Let’s Get Started!
Create a new document 1200 x 1200 pixels with a white background.

Set your foreground colour to #151515, then fill your background using the paint bucket tool. Were now going to setup two guides so our layout stays within the center of our canvas, and has a maximum width of 900 pixels.
In the menu at the top go to “view > new guide”, in the box that pops up enter 150px. Repeat the step only this time enter 1050px.

Preparing Our Wooden Texture
For the header were going to use a wooden texture, the texture ive decided to use is by “Matt Hamm“, you can grab the texture from his flickr page.
Once you have the wooden texture drag it over onto your canvas. When the texture is on your canvas you’ll notice it maybe a bit too big so were going to resize it by 30%. Press ctrl + t to access the free transform tool, at the top of the screen you’ll see a little chain icon. Click the chain icon then enter 70% in the W: and H: fields.

Place the newly resized wooden texure in the top left hand corner of the canvas. Duplicate the wooden texture and place it next to its orginal. Keep duplicating the texture moving it next to the last one until you reach the other side of the canvas.

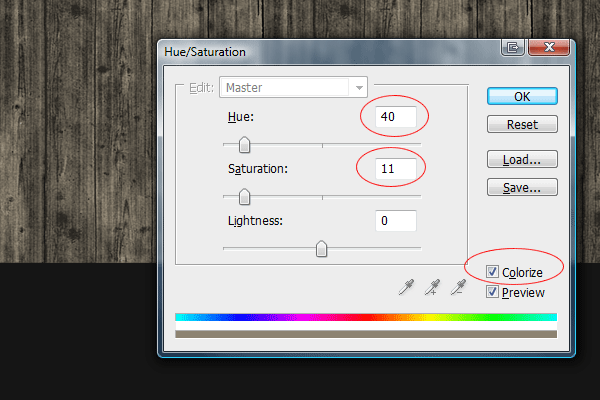
Once you reach the other side of the canvas merge all the wooden texture layers into one layer. Now go to “image > adjustments > hue/saturation” then colorize the wooden texture using the settings below.
Creating The Header
Select the rectangular marquee tool and make a selection around the whole wooden texture, leaving about 60px at the bottom of the texture.

Cut and paste the selection to a new layer, then re-align the texture you just cut back up with the 60px left over. Once re-aligned hide the small part of the wooden texture then add a drop shadow to the big part using the settings below.

Unhide the smaller part of the wooden texture then add a layer mask. Drag a linear gradient from the bottom of the texture to about half way up. The effect were looking to get is like a reflection, you should have something like this.

Select the rectangular marquee tool and make a selection around one of the floor boards.
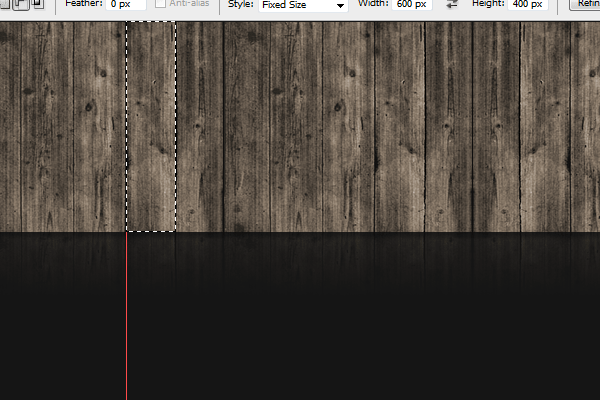
Fill the selection with shade of red, do the same for the next floor board only filling the selection with a new colour, repeat the process until you have something like this.

Set each layers blending mode to “soft light”, you should now have something like this.
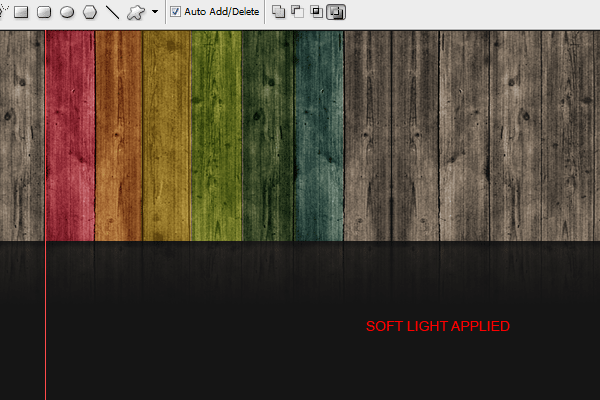
Duplicate all the colours then move the duplicate colours over until you have reached the right guide.

Adding The Header Elements
Select the rectangle tool or the rectangular marquee tool and make a black rectangle at the top of the canvas. Inside the black rectangle add the title of your website in white text. Mines called the design lab, so my first word would be “the” inside a black box.

Press ctrl + t to free transform the black rectangle. Rotate the black rectangle just a little bit.

Do the same for the text only rotate slightly in the opposite direction. Select your text layer then set the layer blending mode to “soft light”, then select the rectangle layer and set the opacity to 40% and the blend mode to “hard light”.

Repeat the steps above for each word in your website title, try randomizing the rotations of the text and rectangles. You should have something like this.
In the top right corner of the header add some social network icons, search bar or something you need for your website. I’ve opted for some social icons by “Jan Cavan“.

Creating The Featured Area
Select the rounded rectangle tool with a radius of 10px.

Drag out a rectangle underneath your header, make sure the rectangle stays within the boundries of the guides.

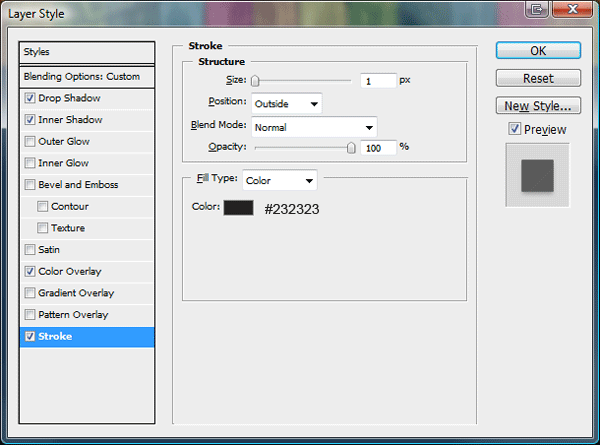
Add these layer styles to the featured rectangle.


Using the rectangle tool or the rectangular marquee tool create a black rectangle inside the feature rectangle. Rotate the rectangle ever so slightly using the free transform tool.

Load a selection around your black rectangle then contract the selection by 10px by going to “select > modify > contract”. Once you’ve contracted the selection paste an example image inside the selection.

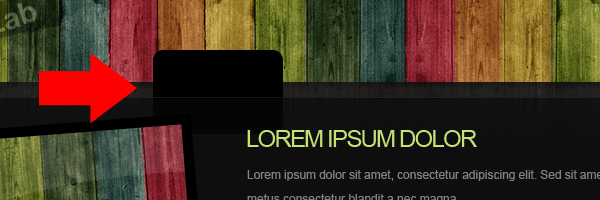
Finish off the image by adding a shine effect by using the pen tool. Were now going to add some left and right arrows, select the arrow shape from photoshop’s custom shapes menu.

Drag out the arrow any where on the canvas filling the arrow with the colour white. Make a selection around the backend of the arrow.

Extend the arrow a little bit, then go to “edit > transform > warp”. Select the top and bottom left anchor points and drag them up so the arrow starts to bend.

Set the arrow’s opacity to 60%, add a drop shadow using the default settings then duplicate the arrow and place one on the right of the image. On the right side of the image add some example featured text.

Creating The Navigation
Select the rounded rectangle tool still with a radius of 10px, on a new layer underneath your featured area drag out a small rectangle.
Duplicate the rectangle as many times as needed.

Add your navigation text to each black rectangle.
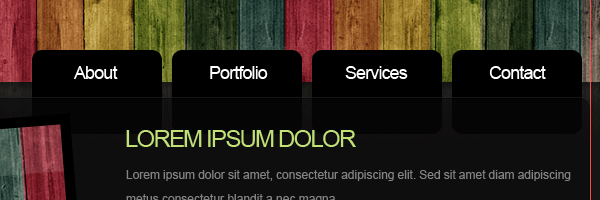
Set each buttons layer opacity to 70% then free transform each button rotating them slightly either left or right. Load a selection around your featured area then go through and select each individual button, once selected hit the delete key, this should remove the excess button from behind the featured area.

Creating The Content Area
Create a big rectangle using the rounded rectangle tool with a radius of 10px. Keep the rectangle within the boundries of the guides. Copy the layer styles from the featured rectangle and paste them onto the content rectangle.

Inside the rectangle add your content, i’ve gone for a simple 3 column look with some nice bold headings.

Creating The Footer
Using the rectangle tool create a rectangle underneath your content area, fill the rectangle with any color then copy and paste the layer styles from either the content or featured rectangles.

Make a selection around your coloured header the same width as the footer. The selection doesnt need to be any higher than about 20-40px. Once you’ve made the selection go to “edit > copy merged” then paste the selection onto the footer at the bottom of the rectangle.

Finish off the footer by adding your footer information.

The Finished Concept

Hope you enjoyed this tutorial, many thanks for reading dont forget to DIGG and RE-TWEET my post. Your help is greatly appreciated, thanks.